
How to Create an AI Agent
Complete guide to creating your first AI agent on Aksita.ai
Open Agents Page
From the dashboard, click the "Agents" menu in the left sidebar or click the "Agents" card on the main dashboard.
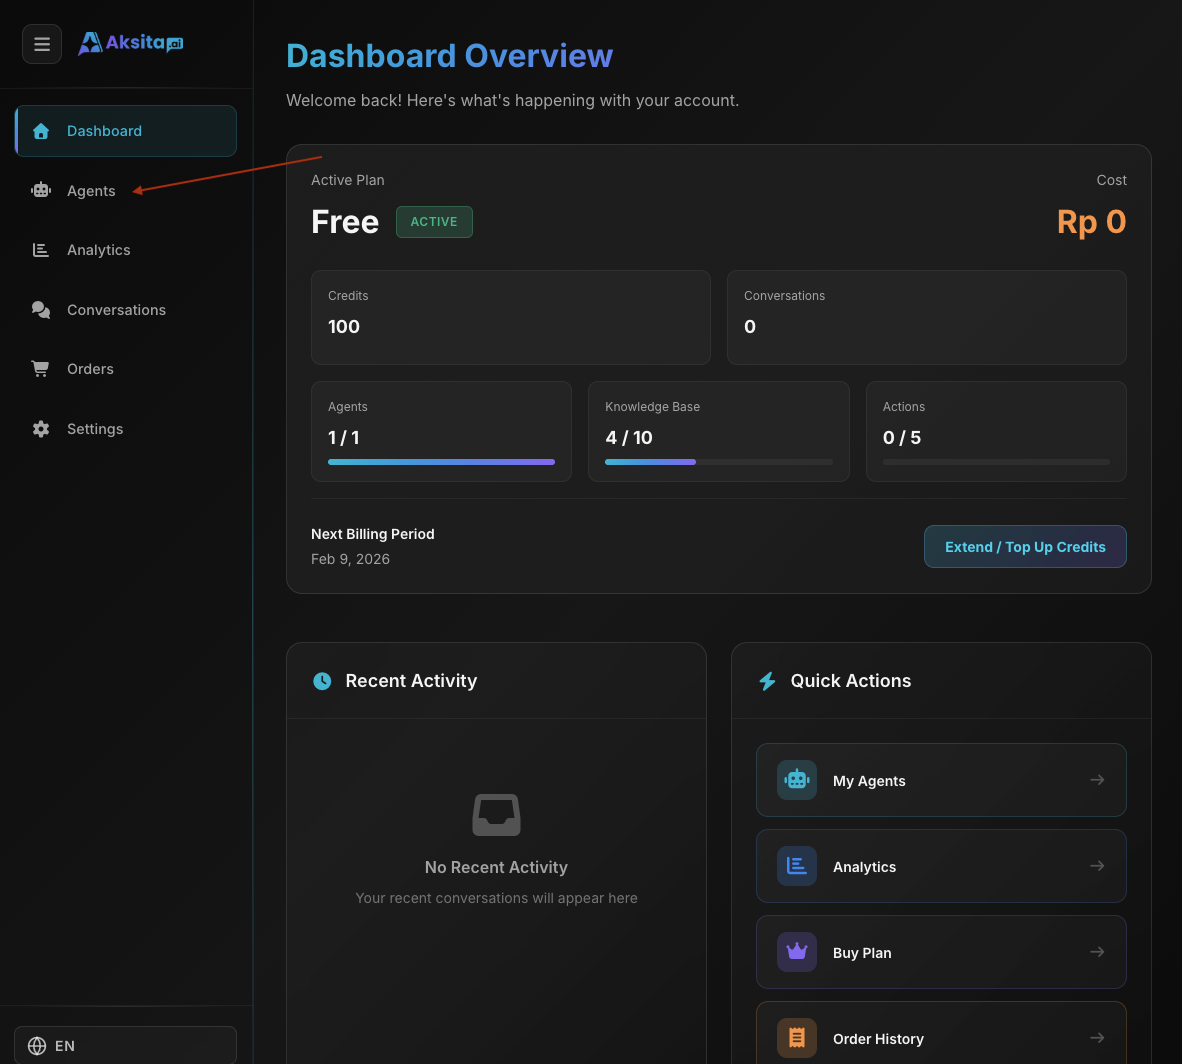
Screenshot: Agents Page
Screenshot: Agents Page
Click "Create New Agent" Button
On the Agents page, click the "Create New Agent" button located in the top right corner.

Screenshot: Create Agent Button
Screenshot: Create Agent Button
Fill Basic Agent Information
Complete the required fields to create your agent.
Required Fields:
- Agent Name: Unique name for your agent (3-50 characters)
- Description: Brief description of the agent (max 100 characters, for automatic agent selection)
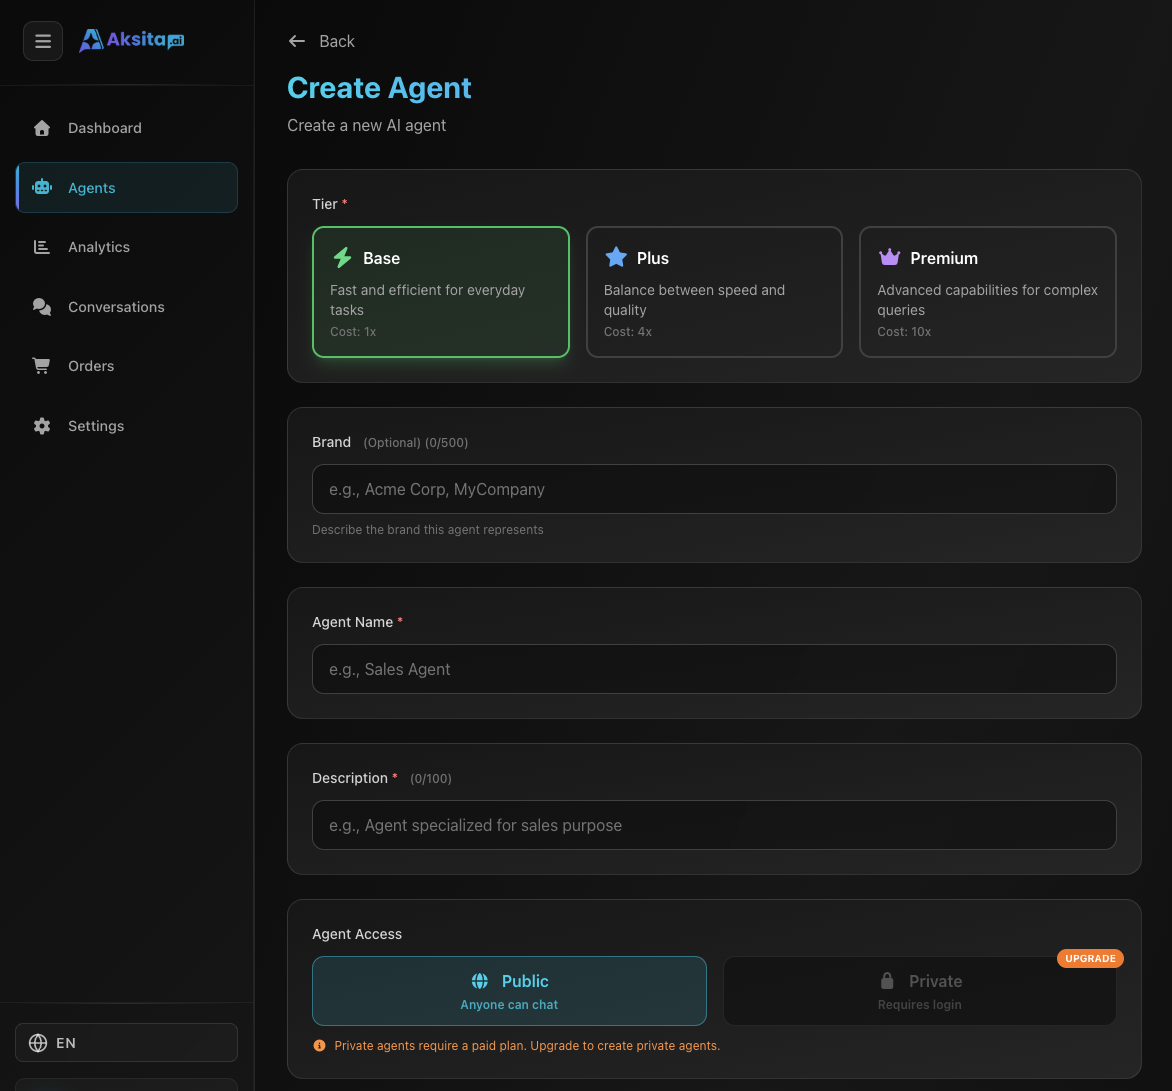
Screenshot: Agent Creation Form
Screenshot: Agent Creation Form
Configure Optional Settings
Customize additional settings to optimize your agent's behavior.
Optional Settings:
- Tone: Choose communication style: Professional, Friendly, Casual, or Formal
- Temperature: Control creativity (0.0-1.0): low = consistent, high = creative
- Visibility: Public (accessible by anyone) or Private (requires login)
- Starter Prompts: Up to 4 clickable questions to help users start conversations
Save and Complete
Click the "Save" button to create your agent. The agent will be immediately active and ready to use.
Agent Created Successfully!
Your agent has been created and is ready to use. You can add knowledge bases and actions to enhance the agent's capabilities.
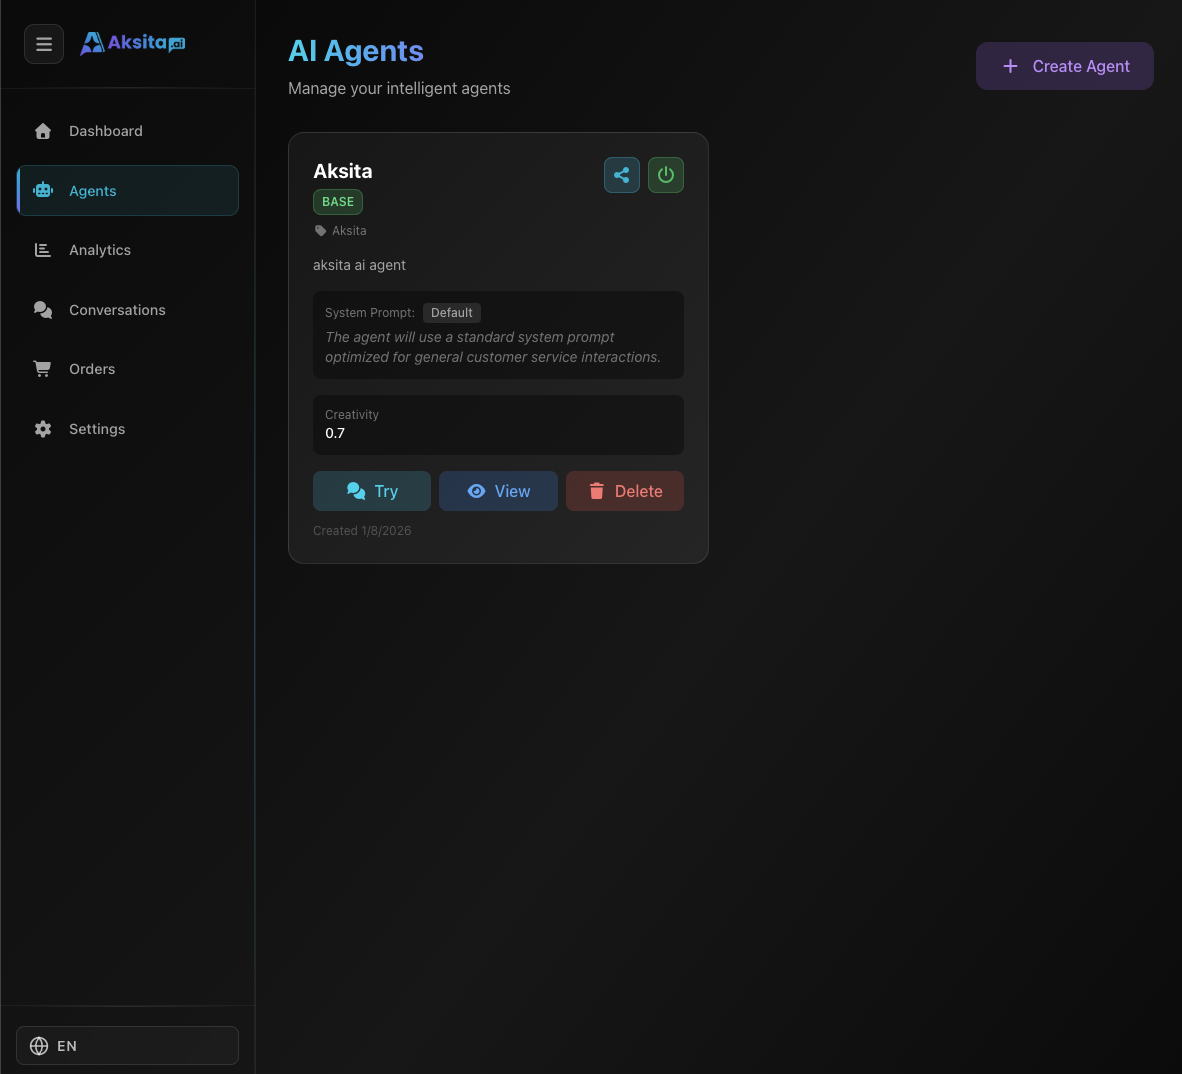
Screenshot: Agent Created
Screenshot: Agent Created
Tips & Tricks
- Create clear and specific system prompts for best results
- Use informative descriptions to facilitate automatic agent selection
- Start with low temperature (0.3-0.5) for consistent responses
- Add starter prompts to guide users in using the agent