
HTTP Actions
Call external REST APIs to perform actions from your agent
What is HTTP Action?
HTTP Action allows your agent to call external REST APIs to perform actions like sending emails, creating orders, updating database, etc. Agent will automatically extract information from user conversation and send it to API.
- • Send email to support team
- • Create product order
- • Update shipping status
- • Send WhatsApp notification
How to Create HTTP Action
- 1 Open Resources → Actions
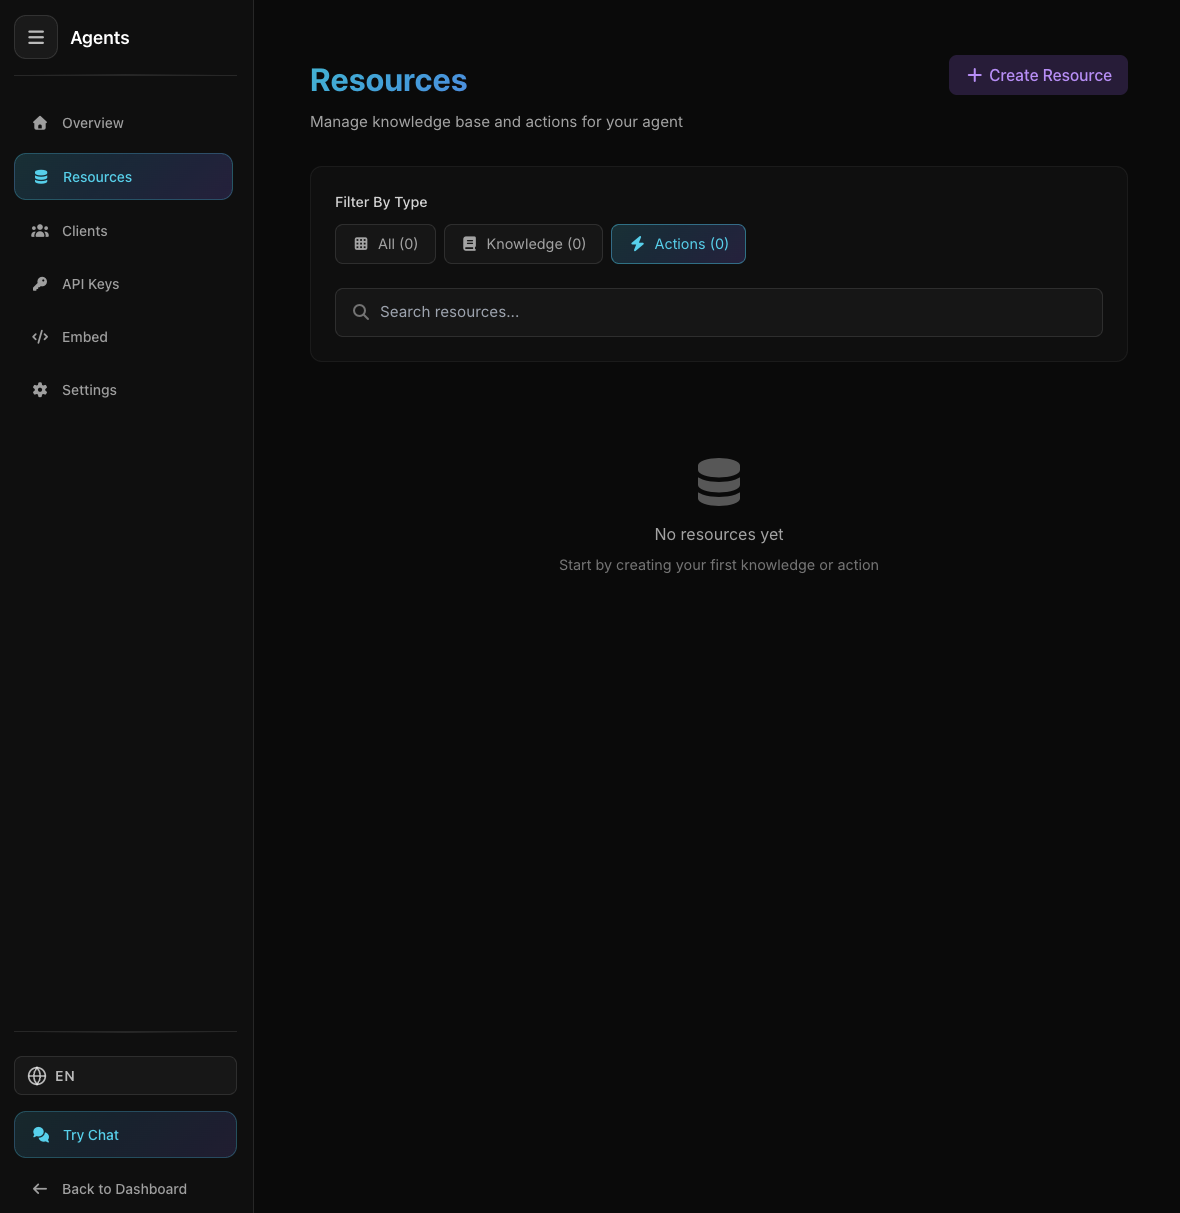
Agent Resources Page
Agent Resources Page
From agent page, click "Resources" tab then select "Actions" → "HTTP"
- 2 Fill Name and Description

HTTP Action Form
HTTP Action Form
Provide clear name and description so agent knows when to use this action.
Name *Short and descriptive name for this action
Example: "Send Email to Support"Description *Explain what this action does and when agent should use it
Example: "Send email to support team when user has issues that need support handling" - 3 Enter API URL
HTTP Action Form with URL and Method
HTTP Action Form with URL and Method
Enter complete API URL and select HTTP method
Select HTTP Method:
GETPOSTPUTPATCHDELETEEnter URL:
https://api.example.com/support/emailDynamic ParametersUse <param> for dynamic parameters:
https://api.example.com/users/<userId>/orders - 4 Add Headers (Optional)

Add Action Headers for Authentication
Add Action Headers for Authentication
Headers for authentication (API key, token) and other configurations
Authorization:
Key: AuthorizationValue: Bearer sk-abc123...Content-Type:
Key: Content-TypeValue: application/json - 5 Define Action Body Parameters
Define Action Body Parameters
Define Action Body Parameters
Data to be sent to API. Agent will extract from user conversation.
subjectrequiredEmail subject
messagerequiredMessage content from user
priorityoptionalPriority: high, normal, low
Agent will send JSON:
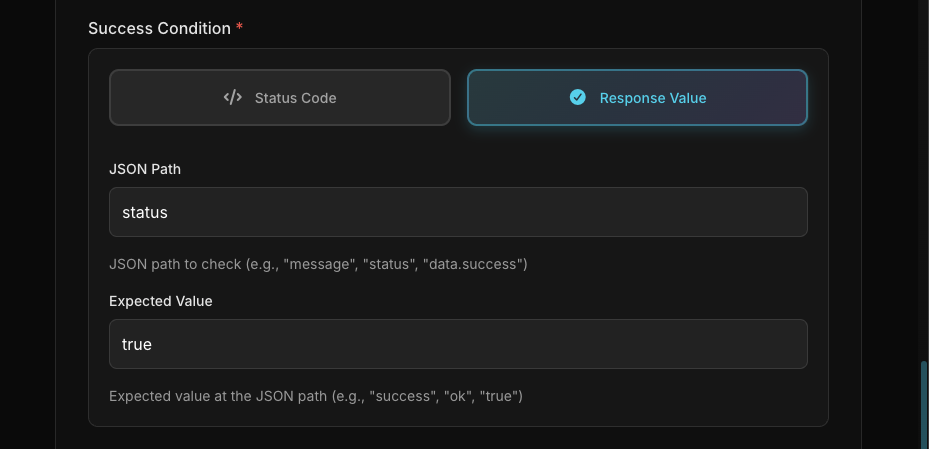
{ "subject": "...", "message": "...", "priority": "high" } - 6 Set Action Success Condition
Set Action Success Condition
Set Action Success Condition
Define when API call is considered success or failed
STATUS CODECheck HTTP status code
Status Code = 200RESPONSE VALUECheck value in JSON response
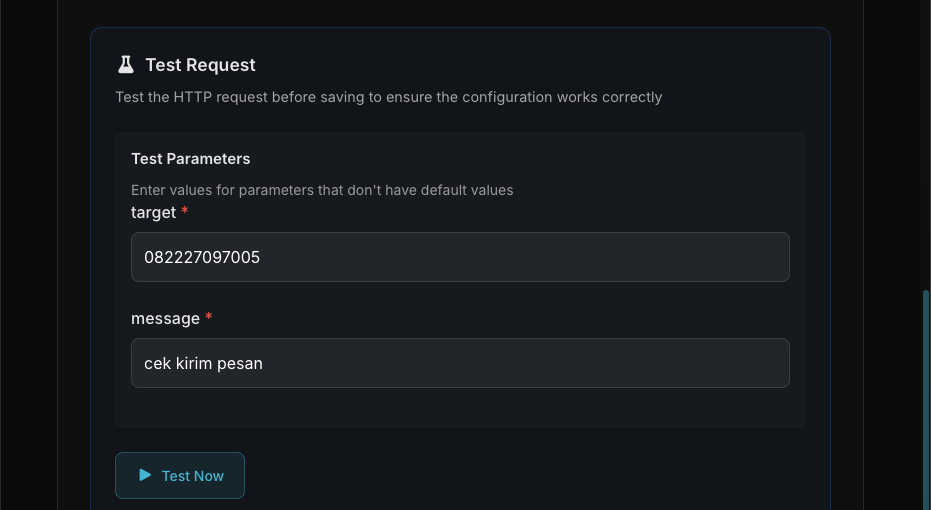
response.status = "success" - 7 Test Configuration
Test HTTP Action
Test HTTP Action
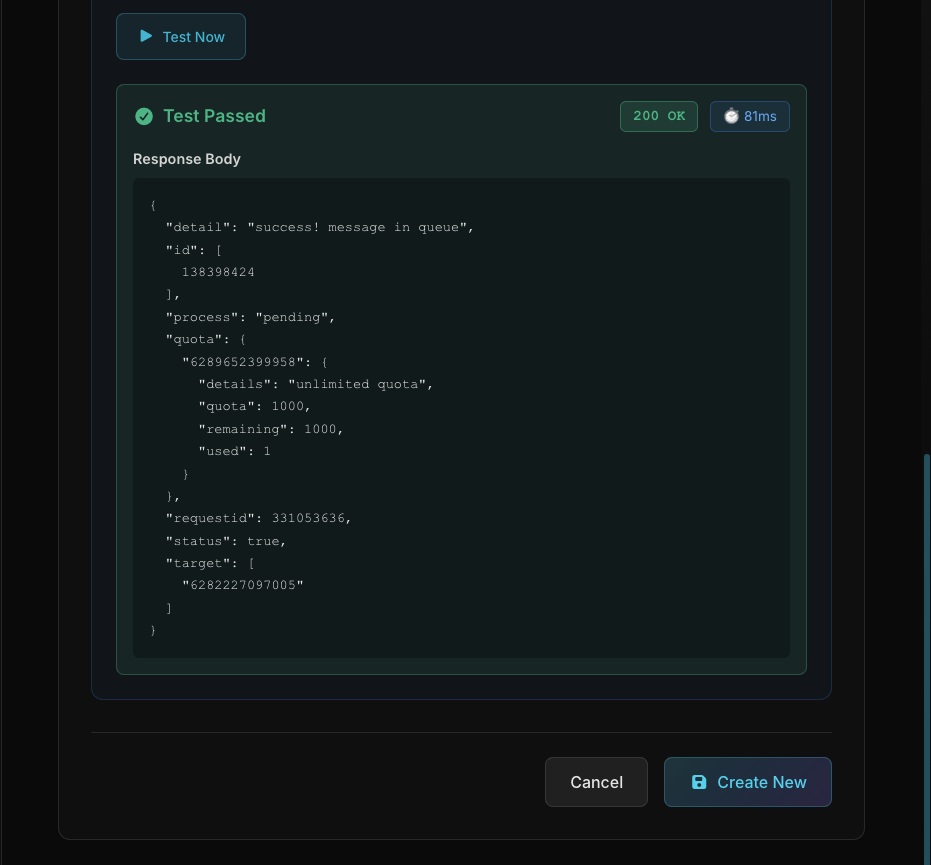
Test before saving to ensure API works
Success✅ Green = success, ❌ Red = failed
Status Code200 = OK, 404 = Not Found, 500 = Error
ResponseData from API
Execution TimeResponse time (ms)
- 8 Click "Create"
Action successfully created
Action successfully created
If test succeeded, click "Create" to save. Action is immediately ready to use!
Ready to Use!Your agent can now use this action. Try chatting and ask agent to perform the action!
🔐 Private Actions
Private Actions are HTTP Actions that require Persistent Context. These actions can access logged-in user data (user ID, email, phone, etc) and send it to the API.
HTTP Actions that can only be executed if the user is "logged in" with Persistent Context. Useful for actions requiring user-specific data like check order, update profile, transfer balance, etc.
- 1. Enable Persistent Context in Agent Settings
- 2. Create Login Node to collect user data
- 3. When creating HTTP Action, check the "Private" checkbox
- 4. Check the "Private" checkbox if action requires user context
The LLM will automatically determine what context data is needed based on your action configuration. You don't need to specify which fields to collect - the AI will analyze the URL, headers, and body to understand what context data is required.
When you use placeholders like <user_id> in your action's URL, headers, or body, the system automatically:
- 1. Identifies required context fields (e.g., user_id, token, email)
- 2. Checks if the data is already available in Persistent Context
- 3. If not available, prompts the user to log in or provide information
- 4. Replaces placeholders with actual context data during execution
You only need to focus on action design - let the AI handle data collection!
Action "Check Balance" for banking bot:
- 🔒 Private Actions can ONLY be executed if user is logged in
- Context data is stored securely in the database
- Use Private Actions for all sensitive operations (transactions, personal data)
- ⚠️ Persistent Context must be enabled in Agent Settings
- ⚠️ Login Node must be created and configured
- ⚠️ User must be "logged in" before using Private Actions
⏱️ Context Requirement & Session
Private Actions require the user to have an active Persistent Context. If the user hasn't logged in, the agent will automatically ask them to log in first before executing the action.
- 1. User requests a Private action (e.g., "Check my balance")
- 2. Agent detects this action is Private and needs context
- 3. If user not logged in, agent automatically requests login first
- 4. After successful login, agent executes action with user context
Check my balance
To check your balance, I need you to log in first. Please enter your username and password.
[fills login form]
Your current balance is Rp 5,000,000
Persistent Context supports two session management modes: Fully Persistent (default) or Time-Based Expiration with refresh logic.
Sessions have no expiration time limit and remain active until users manually log out.
- User context is stored permanently in database
- Users don't need to re-login, even after days of inactivity
- Private Actions are always available without re-authentication
- Best for: applications requiring long-term convenience
Sessions have expiration time and can be automatically refreshed by the agent.
- Expiration Time: Token/session expires after set time (e.g., 1 hour, 24 hours, 30 days)
- Auto Refresh: Agent can have HTTP Action to refresh token before expiration
- Seamless: Users don't need to re-login if refresh succeeds
- Re-login: If refresh fails or token truly expires, users are asked to re-login
- Best for: systems with third-party API tokens that have expiration
Users can log out anytime to clear their context, regardless of session mode:
- Users can request logout through conversation with agent
- After logout, all context and tokens are removed from session
- Users need to log in again to use Private Actions
To use Time-Based Expiration with auto-refresh:
- 1. Store refresh_token and expired_at in Login Action response mapping
- 2. Create a Private HTTP Action to refresh token (e.g., "Refresh Token")
- 3. Agent will automatically call refresh action before token expires
- 4. Response from refresh action will update context with new token
Context data is stored securely in database and can only be accessed by the agent and the user who owns the session. Time-Based Expiration mode provides additional security layer by limiting token validity.
- ✓ Inform users that they need to log in for certain actions
- ✓ Create clear error messages if session expires
- ✓ Use Private Actions only for data that truly needs authentication
- ✓ Test login and re-login flow to ensure smooth UX
Tips & Best Practices
Write detailed description so agent knows when to use action
Always test before saving
Provide clear description for each parameter
Set condition so agent provides appropriate feedback